不想浪費人力在產線上的細瑣任務?想運用 AI 自動化檢測瑕疵,卻苦無技術?如果你也有這些問題,那你或許該考慮 Google 的機器學習平台 Vertex AI 。該平臺可以透過 UI 和 API 輕鬆建構、訓練和部署大規模機器學習模型的過程。即使是完全不懂 AI 的使用者,也可以訓練出高精準度的模型,應用場域包含圖片、文字和影片等。
此外,Vertex AI 提供 Edge 模式讓用戶能夠在地端執行,如此一來不必再 Call api 進行預測,原先每個預測節點每小時需支付 1.375 美元,這些費用在 Edge 模式也可省下來,對於需要大量預測的客戶來說,節省費用相當客觀。
一、情境假設
我們假設的情境如下:為了能讓員工避免產線上的組裝失誤,我們需要檢測生產線上,所有的插槽是否皆為單一。
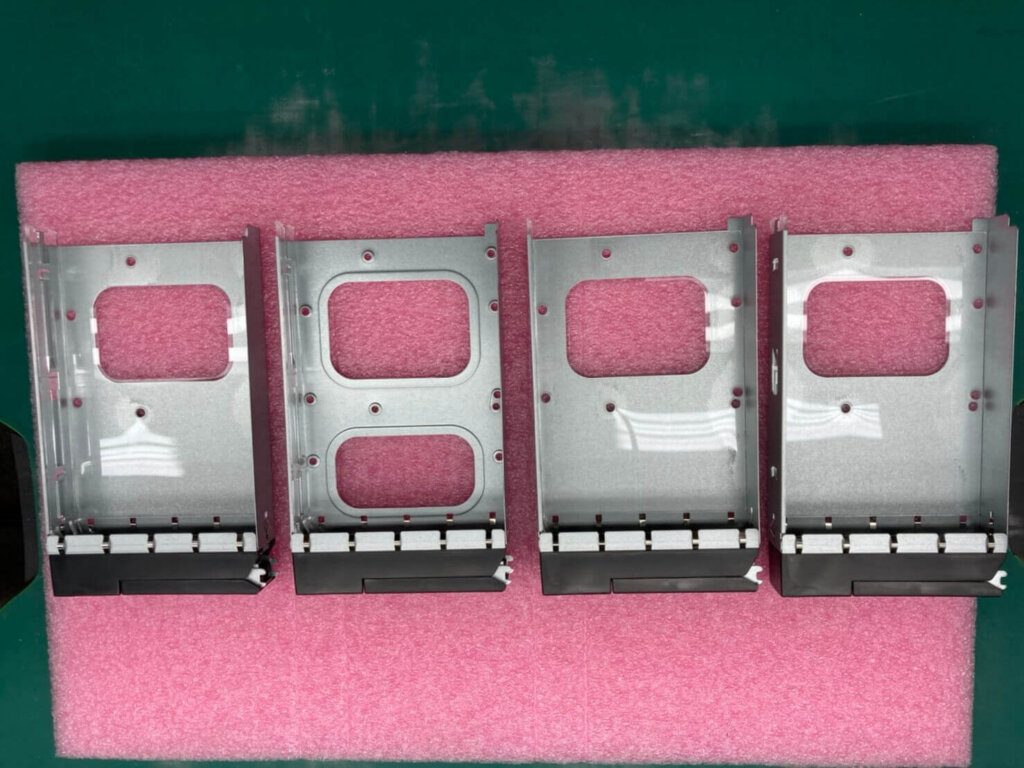
下圖左四個硬碟托盤都為單一插槽,這也是我們希望看到的,因此本張圖片將會標記為 GO 。下圖右則是有其中一個硬碟托盤有兩個插槽,這顯然不符合假設產線的需求,因此會被標記為 NG。另外,考量到工廠可能會需要離線作業,所以本範例將使用 Edge 端的模型預測,僅需本地端的伺服器就能進行預測。

二、圖片分類的詳細步驟
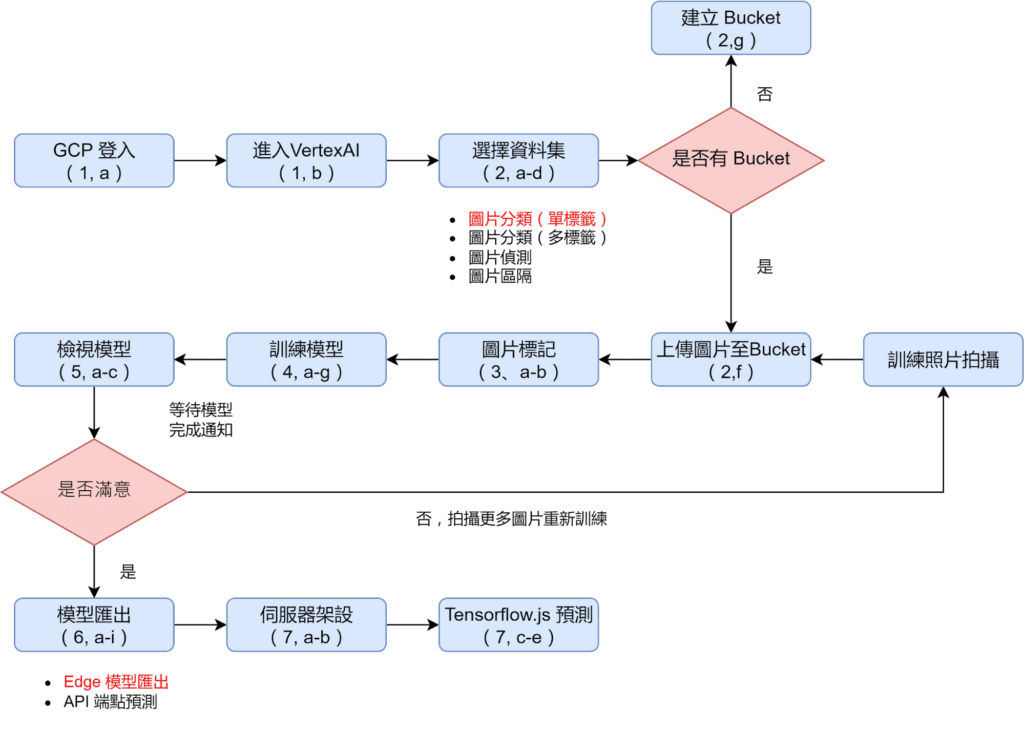
上圖為使用流程圖,每個步驟的詳細內容在括號內的章節
1. 進入 Vertex AI 服務
- a. 打開並登入 Google Cloud Platfrom
- b. 點選導航欄,下滑至Vertex AI。(若找不到可直接去搜尋欄搜尋)
- c. 進入 Vertex AI 後,便會看到資料集、模型與預測

2. 建立資料集種類並匯入圖片
- a. 假設我們要新增資料集,點選「建立資料集」
- b. 為該資料集命名,並選擇任務類型

| 圖片分類(單一標籤) | 每張圖片只有單一標籤,如 : 圖片不是 GO 就是 NG,不會一張圖同時有 GO 和 NG 的標籤。 |
| 圖片分類(多標籤) | 一張圖片中有多個標籤,如 : 標籤同時為NG和 1 個螺絲。 |
| 圖片物件偵測 | 找到物件所在的位置,如 : 所有螺絲在圖片的哪些位置。 |
| 圖片區隔 | 此功能目前仍在測試中,因此不支援 AutoML,需自行寫程式訓練模型。 |
- c. 地區選擇有提供 Vertex AI 服務的地區(如:us-central1),選完按建立
- d. 等待創建完成後,點入剛創建的資料集名稱
- e. 選擇檔案上傳方式,最簡單的方式為直接從電腦上傳圖片。(一次最多為500張)
")
- f. 選取檔案上傳,資料切割選擇「預設」,並選擇 Cloud Storage 的路徑

- g. Cloud Storage 為 GCP 線上的儲存服務,若為第一次建立,需新建 Bucket。
3. 建立資料集種類並匯入圖片
- a. 進入剛創建的資料集,點選「新增標籤」,新增「GO」和「NG」

- b.點選照片加入標籤(可多選照片一次加入標籤)。註:每一個標籤至少要 10 張,官方建議 每一個標籤有 1000 張
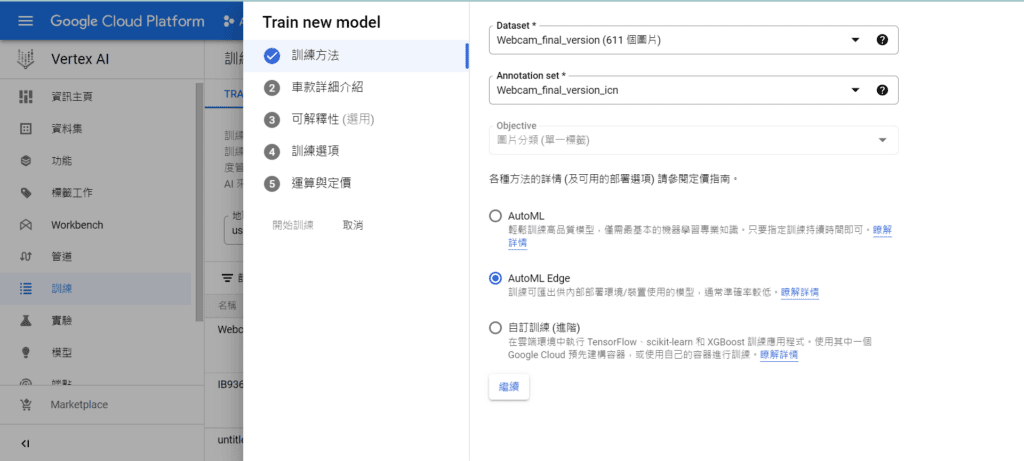
4. 訓練圖片分類模型
- a. 新增完所有標籤後,到訓練頁面訓練模型
- b. 點選建立以新增訓練模型
- c. 選擇新創的資料集,接著選擇部屬方案,完成後點選繼續。
| AutoML | 自動訓練模型,但模型僅能在雲端上進行預測,每次預測都會消耗GCP 餘額,且無法部署於本地端。 |
| AutoML Edge | 同樣是自動訓練模型,但模型可以下載匯出至本地端,之後預測不會消耗 GCP 餘額,只是預測效果相較於 AutoML 較差。 |
| 自訂訓練 | 自行寫程式訓練模型。 |
- d. 車款詳細介紹(此為 Google 翻譯錯誤,應為資料切割):這是用來選擇資料集的切割方式。首先命名模型,接著點開ADVANCED OPTIONS 可以選擇資料切割的比例。

- e. 車款詳可解釋性用於解釋模型判斷的原則,但勾選會增加收費。

- f. 訓練選項,自行挑選適合的選項
- g. 運算與定價,設置運算時間上限,最短為一小時。(600 多張圖片訓練約半小時)

5.檢視模型詳細資料
- a. 左側導覽欄點選模型,點選進入新建的模型

- b. 模型詳細資料,包含精確度等評估指標

- c. 評估指標視覺化

6.匯出模型並下載至地端
- a.匯出模型,選擇 TensorFlow.js,此類型能將渲染於網頁上,方便應用。

- b. 選擇 Cloud Storage 的儲存路徑,點選匯出

- c. 匯出完成後,至 Cloud Storage 下載模型

- d. 複製指令

- e. 點選 Cloud shell,貼上複製指令
- f. 完成後,在 Shell 輸入 ll

- g. 複製欲下載的模型名稱

- h. 點選三點標誌會出現下拉選單,選擇下載

- i. 將複製的模型名稱貼上至尾端,點選下載便完成
- i. 將複製的模型名稱貼上至尾端,點選下載便完成
7.使用 javascript 預測
由於我們使用 Tensorflow.js,因此可以輕鬆部屬於網頁瀏覽器上,而我們首先架設伺服器。
- a. 安裝 simple-http-server,如已安裝可跳過。(需有 Python 環境)
| python3 -m pip install simple_http_server |
- b. 透過 Python 執行 Web app
| python3 -m http.server 8000 |

- d. 在瀏覽器打開 http://localhost:8000,網頁便會出現「Upload Image」,點選此即可上傳圖片。
- e. 圖片上傳後,預測結果就會顯示在圖片下方。以下圖為例,有一個插槽為雙層,因此這張圖應為NG。而 AI 模型也成功預測其為NG的可能性高達 0.86,明顯高於GO的0.13。

三、總結 –Vertex AI
對於組織內沒有專門的 AI 人員來說,使用 AutoML 最大的優勢在於不需要高深的 AI 技術,也可以訓練出高精準度的模型,大幅減少訓練人才所需的成本。而適合的 AI 模型與部署方式,不僅可以幫助作業員檢測產線上的物件是否正確,也可以讓作業員專注在更為複雜的作業上。當然要發揮 AI 的最大用處,關鍵不只是模型的訓練與部屬,資料的前處理(ETL)也是 AI 自動化的重要環節。如有興趣了解適合自己的 AI 應用情境,也歡迎來信諮詢。
發布日期 : 2022-05 | Jeff
更多雲地混合解決方案 : 雲地混合規劃與建置
從 0 到 1 教你如何用 AI 進行瑕疵檢測 | Google Cloud Vertex AI
| Google 的機器學習平台 Vertex AI
| Vertex AI – 使用整合式人工智慧平台中的預先訓練和自訂工具,加快建立、部署及擴充機器學習模型的速度